
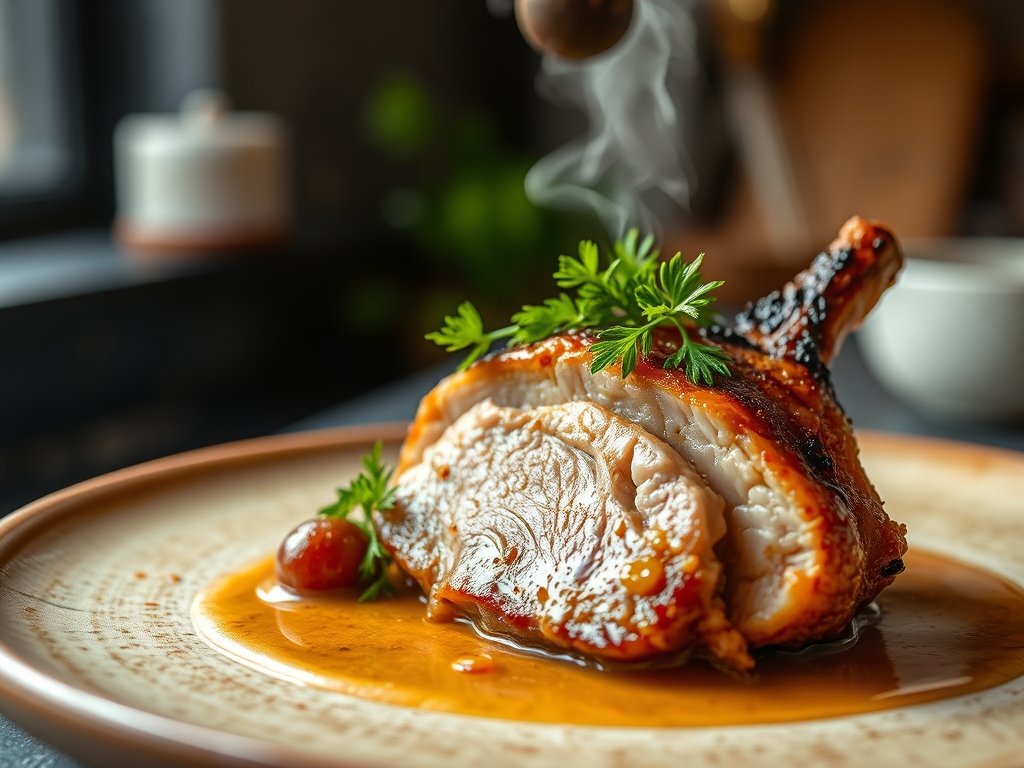
Listen to the sound of a high-performance kitchen at peak capacity. It is not a melody; it is a mechanical roar. The center of this auditory storm is the Pork Shoulder Sear. This is where the physics of heat meets the biology of connective tissue. When that massive primal cut hits the shimmering oil in a heavy-bottomed Dutch oven, the Maillard reaction initiates a molecular transformation. We are not just cooking; we are re-engineering protein. The scent is intoxicating, a heavy cloud of aerosolized lipids and caramelized amino acids that signals the beginning of a long-form rendering process. To the untrained eye, it is just browning meat. To the culinary auditor, it is the foundational infrastructure of flavor. If you fail the sear, you fail the dish. A weak, grey surface is a structural defect that no amount of braising liquid can repair. We demand a crust that is dark, mahogany, and structurally sound. This is the baseline of high-output gastronomy. Let us begin the audit.
THE DATA MATRIX
| Metric | Specification |
|---|---|
| Prep Time | 45 Minutes |
| Execution Time | 6 to 8 Hours |
| Yield | 10 to 12 Servings |
| Complexity (1-10) | 7 |
| Estimated Cost per Serving | $2.45 / 2.25 Euro |
THE GATHERS
Ingredient Protocol:
- Pork Shoulder (Bone-in): 3.6kg / 8 lbs
- Kosher Salt: 60g / 4 tbsp
- Coarse Black Pepper: 15g / 2 tbsp
- Neutral High-Smoke Point Oil: 60ml / 4 tbsp
- Yellow Onions (Diced): 450g / 3 cups
- Garlic Cloves (Smashed): 40g / 8 cloves
- Chicken Stock (Low Sodium): 950ml / 4 cups
- Apple Cider Vinegar: 120ml / 0.5 cups
- Smoked Paprika: 10g / 2 tbsp
Section A: Ingredient Quality Audit:
The primary failure point in raw material procurement is moisture content. Supermarket pork is often injected with a saline solution to "enhance" weight. This is a disaster for a Pork Shoulder Sear. When that excess water hits the pan, it flashes to steam, lowering the surface temperature and preventing caramelization. If your meat looks "wet" or sits in a puddle of pink liquid, you must perform a dry-brine intervention. Coat the exterior in salt and leave it uncovered on a wire rack in the refrigerator for at least 12 hours. This utilizes osmosis to pull moisture out and then reabsorb the concentrated brine, tightening the protein structure. Additionally, ensure your aromatics are fresh. If your garlic has sprouted green "hearts," remove them; those bitter embryos will ruin the piquant profile of your finished sauce.
THE MASTERCLASS
1. Surface Desiccation and Seasoning
Before the meat touches the pan, it must be surgically dry. Use heavy-duty paper towels to remove every trace of surface moisture. Use a digital scale to measure your salt and pepper precisely. Apply the seasoning from a height of twelve inches to ensure an even distribution across every square centimeter of the pork.
Pro Tip: Surface moisture is the enemy of the Maillard reaction. By drying the meat, you ensure that the thermal energy goes directly into browning the proteins rather than evaporating water.
2. Calibrating the Thermal Environment
Place your Dutch oven over medium-high heat. Add the oil and wait for the first wisps of blue smoke. This indicates the oil has reached its kinetic limit and is ready to render the pork fat.
Pro Tip: Use an infrared thermometer to verify the pan surface has reached 205C (400F). A heavy cast-iron vessel provides the thermal mass necessary to maintain temperature when the cold meat is introduced.
3. The High-Impact Pork Shoulder Sear
Lay the pork into the vessel away from your body to prevent oil splatter. Do not move it. We are looking for a deep, crusty exterior. Use a pair of heavy-duty tongs to rotate the meat every 4 to 5 minutes until all six sides are dark mahogany.
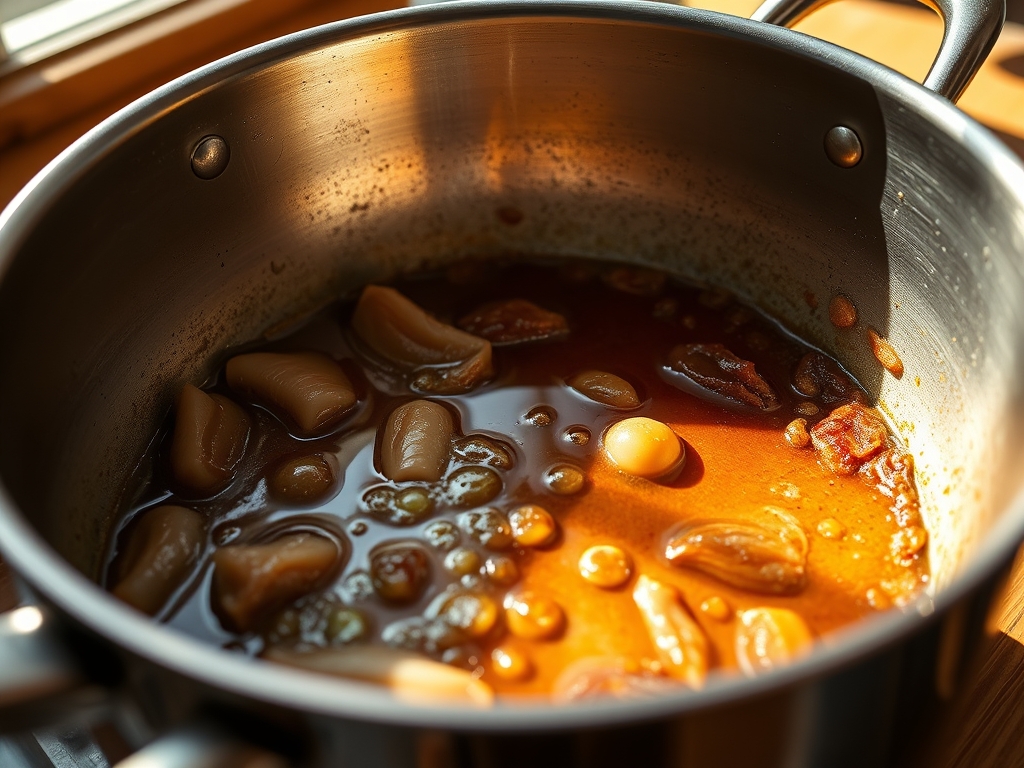
Pro Tip: This stage creates "fond," the caramelized protein bits stuck to the bottom of the pan. This is the concentrated essence of the dish. Use a bench scraper later to ensure no flavor is left behind.
4. Deglazing and Lipid Integration
Remove the pork and set it aside. Add your onions and garlic to the rendered fat. Once they are translucent, pour in the apple cider vinegar to deglaze the pan. Scrape the bottom vigorously to incorporate the fond into the liquid.
Pro Tip: The acidity in the vinegar acts as a solvent, breaking the chemical bonds of the caramelized proteins and suspending them in a viscous sauce base.
5. The Long-Form Thermal Breakdown
Return the pork to the vessel and add the stock until it reaches halfway up the side of the meat. Cover tightly and place in a 150C (300F) oven. This low-and-slow approach allows the collagen to melt into gelatin without toughening the muscle fibers.
Pro Tip: Use a saucier to reduce the braising liquid at the end of the process. This concentrates the flavors and creates a silky mouthfeel through natural emulsification.
Section B: Prep & Timing Fault-Lines:
The most common human error is impatience during the sear. If you flip the meat too early, the proteins will stick to the metal, tearing the surface and leaving the best flavor behind. This is a "cold-bond" error. Wait for the meat to naturally release from the pan. Another timing fault occurs during the braise. If you pull the pork when the internal temperature is 75C (165F), it will be tough. You must wait for the "collagen window" between 90C and 95C (195F-205F). Use a calibrated digital probe to verify this. If the probe does not slide in like it is hitting warm butter, the infrastructure of the connective tissue has not yet collapsed.
THE VISUAL SPECTRUM
Section C: Thermal & Visual Troubleshooting:
Referencing the Masterclass photo, observe the specific "lacquered" look of the crust. If your pork looks pale or grey, your heat was too low or the pan was overcrowded. To fix this, remove the meat, increase the heat until the oil shimmers, and re-sear. If the liquid in the pot looks "broken" or oily, the fat has not emulsified. Use an immersion blender to aerate the sauce and force the lipids into a stable suspension. If the final product looks dull, it lacks acidity. A final splash of vinegar or citrus will brighten the visual "pop" and the flavor profile simultaneously. The meat should be dark on the outside and pale pink/white on the inside, easily yielding to the slight pressure of a fork.
THE DEEP DIVE
Macro Nutrition Profile:
A standard 170g (6oz) serving contains approximately 420 calories, 32g of protein, and 30g of fat. While high in lipids, the majority of the rendered fat can be skimmed from the top of the braising liquid after cooling to reduce caloric density.
Dietary Swaps:
- Vegan: Replace pork with large "steaks" of Lion's Mane mushroom. Use vegetable stock and liquid smoke to mimic the depth of the sear.
- Keto: This recipe is naturally keto-compliant. Ensure the chicken stock has no added sugars or cornstarch.
- GF: The recipe is naturally gluten-free. Avoid using flour to thicken the sauce; use reduction techniques instead.
Meal Prep & Reheating Science:
To maintain molecular structure, store the pork in its own braising liquid. This prevents oxidation and "warmed-over flavor." When reheating, do not use a microwave; the agitated water molecules will toughen the protein. Instead, reheat gently in a covered pan over low heat to allow the gelatin to reliquefy and infuse the meat fibers.
THE KITCHEN TABLE
Why is my sear uneven?
Your pan is likely warped or your heat source is not centered. Use a heavy cast-iron Dutch oven to ensure even heat distribution across the entire surface area of the meat.
Can I skip the sear to save time?
Negative. The Pork Shoulder Sear is responsible for the complex flavor compounds known as melanoidins. Without it, your pork will taste like "boiled meat," lacking the depth and structural integrity required for high-level cuisine.
What if my braising liquid evaporates?
Your lid seal is compromised. Check for gaps or use a layer of parchment paper between the pot and the lid to create a "cartouche." Add more stock immediately to prevent burning the sugars in the fond.
How do I get a thicker sauce without flour?
Remove the meat and crank the heat. Rapid boiling evaporates water while leaving proteins and fats behind. This creates a naturally thick, viscous glaze that coats the back of a spoon perfectly.

