
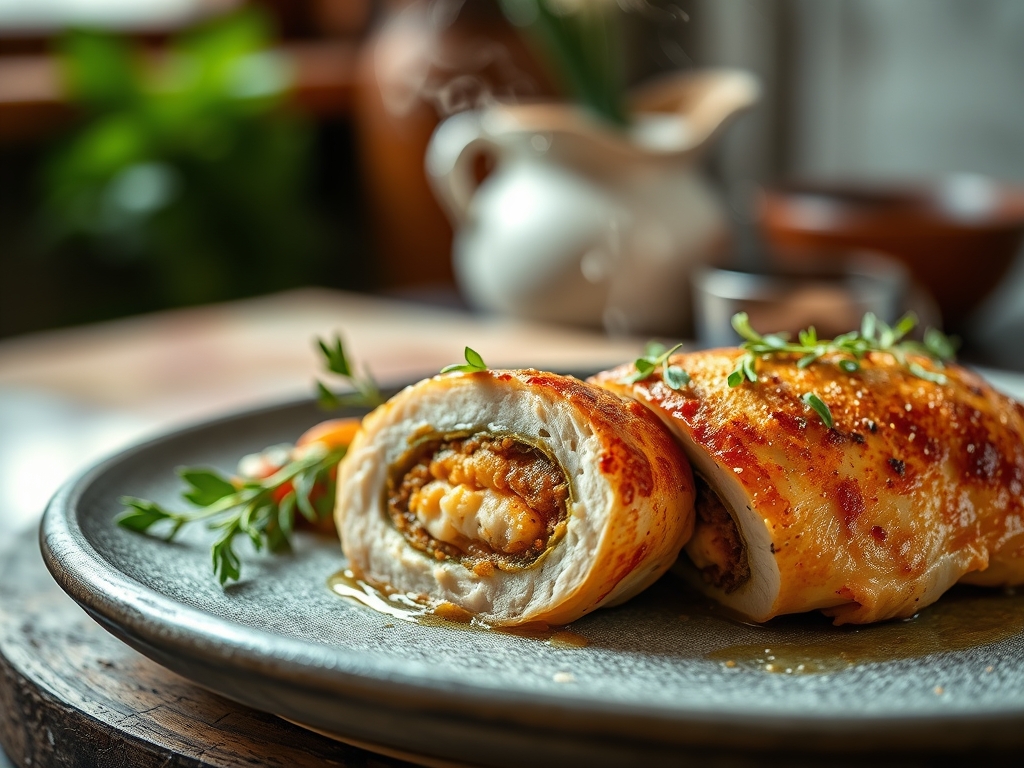
Imagine the kitchen as a high-stakes laboratory where the primary objective is the structural integrity of protein. We are not merely cooking; we are managing a complex thermal exchange within a biological vessel. The Stuffed Chicken Breast represents the pinnacle of this architectural challenge. It is a delicate balance of moisture retention and interior temperature regulation. When the knife first breaches the golden, crispy exterior, the release of steam should carry the scent of herbs and rendered fats. This is the moment where the infrastructure of the dish is tested. If the pocket was not sealed with precision, the filling escapes like a structural failure in a dam. If the heat was too aggressive, the outer fibers turn to sawdust while the core remains dangerously cold. We are looking for a specific synergy of textures: the snap of the skin, the suppleness of the meat, and the viscous, molten center that binds the experience together. Let us audit the process to ensure your next execution is nothing short of a culinary masterwork.
THE DATA MATRIX
| Metric | Specification |
|---|---|
| Prep Time | 25 Minutes |
| Execution Time | 35 Minutes |
| Yield | 4 Servings |
| Complexity (1-10) | 7 |
| Estimated Cost per Serving | $4.50 |
THE GATHERS
Ingredient Protocol:
- 4 Large Chicken Breasts (approx. 200g / 7oz each)
- 150g / 5.3oz Goat Cheese or Cream Cheese
- 50g / 1.7oz Fresh Spinach, wilted and squeezed dry
- 30g / 1oz Sun-dried tomatoes, finely diced
- 3 cloves Garlic, minced
- 10ml / 2 tsp Olive oil
- 5g / 1 tsp Smoked paprika
- 2g / 0.5 tsp Kosher salt
- 1g / 0.25 tsp Freshly cracked black pepper
- 4 Kitchen Grade Toothpicks or Butcher's twine
Section A: Ingredient Quality Audit:
The most common failure point in a Stuffed Chicken Breast is the moisture content of the filling. If your spinach is not squeezed until it is bone-dry, the water will turn to steam during the thermal phase; this creates an internal pressure cooker that will blow the seams of your protein. If you find your cheese is too crumbly and lacks the necessary viscous quality, temper it with a tablespoon of heavy cream to ensure it melts into a cohesive sauce rather than separating into oily curds. For the chicken itself, ensure it has reached room temperature before the audit begins. Cold protein fibers contract violently when hitting a hot pan, which leads to a tough, unyielding texture.
THE MASTERCLASS
1. The Surgical Incision
Using a sharp boning knife or chef's knife, create a pocket in the thickest part of the breast. Do not cut all the way through the other side; you are creating a secure envelope, not a tunnel.
Pro Tip: Use a digital scale to ensure each breast is within 10 grams of the others. This ensures uniform thermal penetration across all units. The science here involves surface-area-to-volume ratios; consistency in size prevents one unit from drying out while another remains undercooked.
2. Filling Synthesis
In a stainless steel mixing bowl, combine the cheese, spinach, garlic, and sun-dried tomatoes. Use a bench scraper or a stiff spatula to fold the ingredients until they are perfectly homogenous.
Pro Tip: The goal is to infuse the fat of the cheese with the aromatics. By dicing the sun-dried tomatoes finely, you increase the surface area, allowing the piquant acidity to distribute evenly throughout the dairy matrix.
3. Structural Encapsulation
Spoon the mixture into the pocket. Do not overfill; the cheese will expand as it heats. Secure the opening with a toothpick or a single stitch of twine to prevent a breach during the sear.
Pro Tip: Use the back of a spoon to pack the filling toward the rear of the pocket. This leaves a "buffer zone" at the opening, reducing the likelihood of cheese leaking out and burning on the pan surface.
4. The Maillard Execution
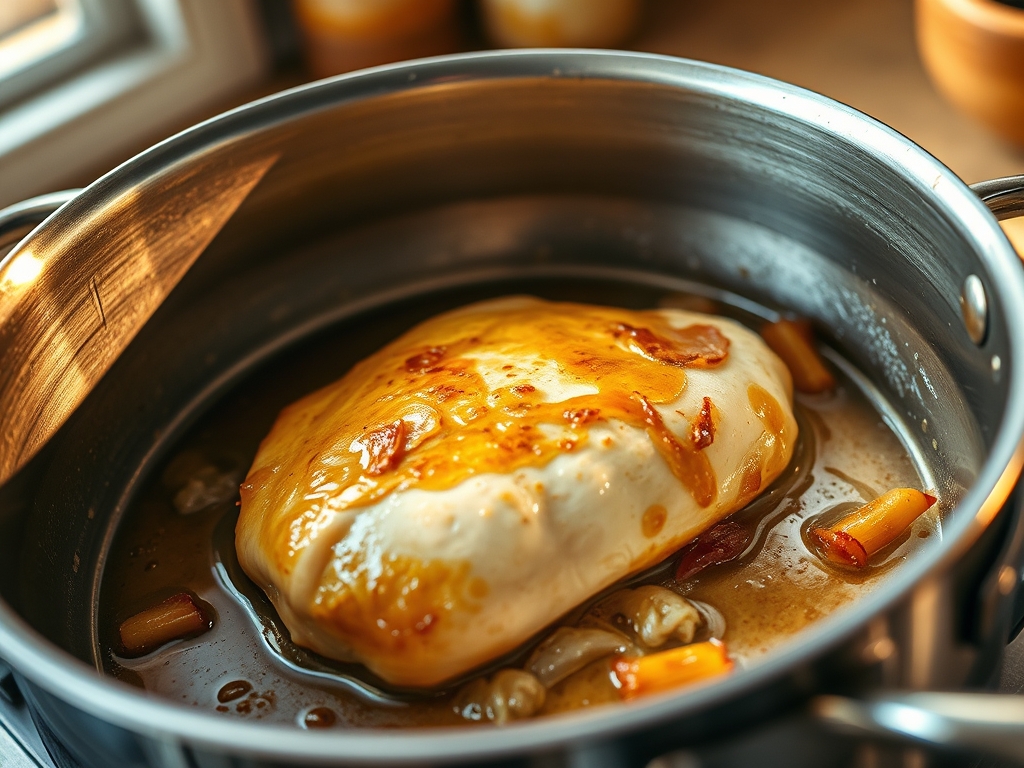
Heat olive oil in a heavy-bottomed saucier or cast-iron skillet over medium-high heat. Sear the chicken for 3 to 4 minutes per side until a deep mahogany crust forms.
Pro Tip: This is the Maillard reaction in action. The amino acids and reducing sugars are rearranging to create hundreds of different flavor compounds. Do not crowd the pan; overcrowding drops the temperature and causes the chicken to steam rather than sear.
5. Thermal Completion
Transfer the pan to a preheated oven at 200C / 400F for 12 to 15 minutes. Use a meat thermometer to verify an internal temperature of 74C / 165F.
Pro Tip: Always measure the temperature of the meat, not the filling. The filling may reach temperature faster than the surrounding protein. A digital probe thermometer is the only way to ensure safety without sacrificing the moisture of the breast.
Section B: Prep & Timing Fault-Lines:
Human error often manifests in the "resting" phase. If you cut into the Stuffed Chicken Breast immediately after it exits the oven, the internal pressure will force all the juices out onto the plate. This results in a dry protein and a soggy presentation. Allow a minimum of 5 minutes for the fibers to relax and reabsorb the moisture. If your timing is off and the chicken finishes before your side dishes, tent it loosely with foil. Do not wrap it tightly; tight foil creates a steam tent that will soften the crispy skin you worked so hard to achieve.
THE VISUAL SPECTRUM
Section C: Thermal & Visual Troubleshooting:
Referencing the Masterclass photo, notice the specific "Glistening Mahogany" hue of the exterior. If your chicken looks pale or grey, your pan was not hot enough or was too crowded. This lack of color indicates a failure to render the surface fats properly. If you see the filling "bleeding" out in a messy pool, your incision was likely too large or your seal was insufficient. For a professional finish, deglaze the pan with a splash of white wine or chicken stock after removing the meat. This captures the fond (the brown bits) and creates a glossy, translucent pan sauce that enhances the visual appeal and adds a final layer of umami.
THE DEEP DIVE
Macro Nutrition Profile:
A standard 200g serving provides approximately 45g of protein, 18g of fat (varying by cheese type), and 4g of carbohydrates. This makes it a high-efficiency fuel source for muscle recovery and metabolic stability.
Dietary Swaps:
- Vegan: Replace chicken with a large Portobello mushroom cap and use a cashew-based "cheese" mixed with nutritional yeast.
- Keto: This recipe is naturally keto-compliant; increase the fat content by wrapping the exterior in bacon before searing.
- GF: Ensure your sun-dried tomatoes are not packed in a thickener containing gluten.
Meal Prep & Reheating Science:
To maintain the molecular structure when reheating, avoid the microwave. The microwave agitates water molecules, which can cause the cheese to separate and the chicken to become rubbery. Instead, use an air fryer or oven at 175C / 350F. This regenerates the crispy exterior while gently warming the interior through convection rather than radiation.
THE KITCHEN TABLE
Why is my chicken dry despite the stuffing?
You likely overcooked the protein. The stuffing adds moisture, but it cannot compensate for decimated protein fibers. Use a thermometer and pull the chicken at 71C / 160F; carryover cooking will bring it to the safe 74C / 165F mark.
Can I use frozen spinach for the filling?
Yes, but the "Dry Audit" is even more critical. Frozen spinach holds significantly more cellular water. Thaw it completely and wring it out using a clean kitchen towel until no more liquid can be extracted.
How do I prevent the cheese from curdling?
Avoid high-acid additions like excessive lemon juice inside the pocket. Acid can cause the proteins in the cheese to clump. Save the citrus for a bright, finishing squeeze over the exterior once the thermal process is complete.
What is the best way to secure the pocket?
Soaked wooden toothpicks are the industry standard for home cooks. Soaking them prevents them from charring in the oven. For a more "white tablecloth" presentation, use butcher's twine to tie the breast like a small roast.

