
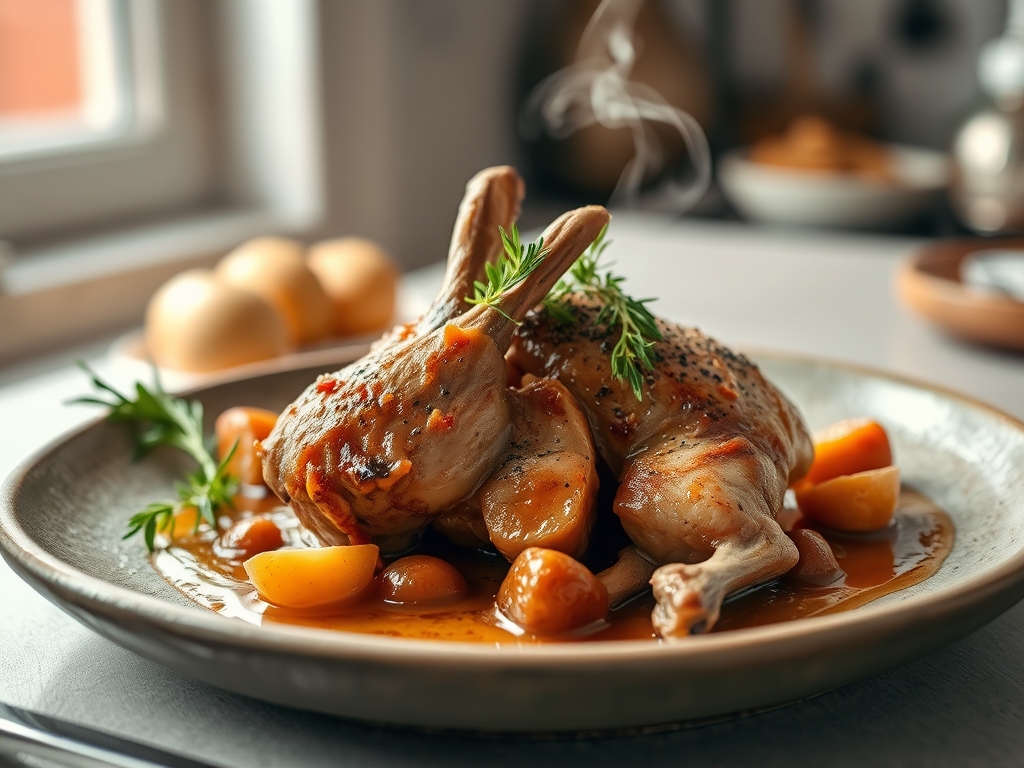
Welcome to the high stakes arena of game protein management. We are moving beyond the pedestrian realm of chicken and entering the world of lean, bi phasic assets. When you engage in Braised Rabbit Prep, you are not just cooking; you are performing a delicate thermal extraction on a protein that possesses zero margin for error. Rabbit is notoriously lean, meaning it can pivot from a succulent masterpiece to a desiccated bundle of fibers in a matter of seconds. To master this, we must leverage the power of moisture and fat to insulate the muscle tissue against the aggressive heat of the stove. We are looking for that perfect moment where the connective tissue dissolves into a viscous, collagen rich sauce while the meat remains tender and hydrated. This is an audit of your culinary infrastructure. If your knife is dull or your heat control is erratic, the rabbit will win. Prepare your station, calibrate your senses, and let us begin the systematic transformation of this wild asset into a piquant, world class braise.
THE DATA MATRIX
| Metric | Specification |
|---|---|
| Prep Time | 45 Minutes |
| Execution Time | 120 Minutes |
| Yield | 4 Servings |
| Complexity (1-10) | 7 |
| Estimated Cost per Serving | $12.50 |
THE GATHERS
Ingredient Protocol:
- 1 Whole Rabbit (approx. 1.3kg / 2.8 lbs), jointed into 6-8 pieces.
- 150g / 5.3 oz Smoked Pancetta, diced for fat rendering.
- 300ml / 1.2 cups Dry White Wine (e.g., Sauvignon Blanc).
- 500ml / 2.1 cups High Gelatin Chicken Stock.
- 30g / 2 tbsp Unsalted Butter.
- 20ml / 1.4 tbsp Extra Virgin Olive Oil.
- 3 Large Shallots, finely minced.
- 4 Cloves of Garlic, smashed and peeled.
- 2 Large Carrots, cut into 1cm rounds.
- 10g / 0.35 oz Fresh Thyme Sprigs.
- 15g / 0.5 oz Dijon Mustard.
- Fine Sea Salt and Cracked Black Pepper to taste.
Section A: Ingredient Quality Audit:
The primary failure point in Braised Rabbit Prep is the source material. If the rabbit appears grey or has a dull, tacky surface, the pH levels have shifted, leading to a "gamey" off flavor. To fix this, soak the joints in a 3 percent salt brine for 60 minutes before cooking; this will infuse the cells with moisture and draw out residual blood. If your pancetta is too salty, it will overwhelm the delicate rabbit. Blanch the pancetta in boiling water for two minutes to strip excess sodium before you render the fat. Finally, ensure your stock is rich in natural gelatin. If using store bought stock, whisk in 5g of unflavored gelatin to mimic the mouthfeel of a professional kitchen reduction.
THE MASTERCLASS
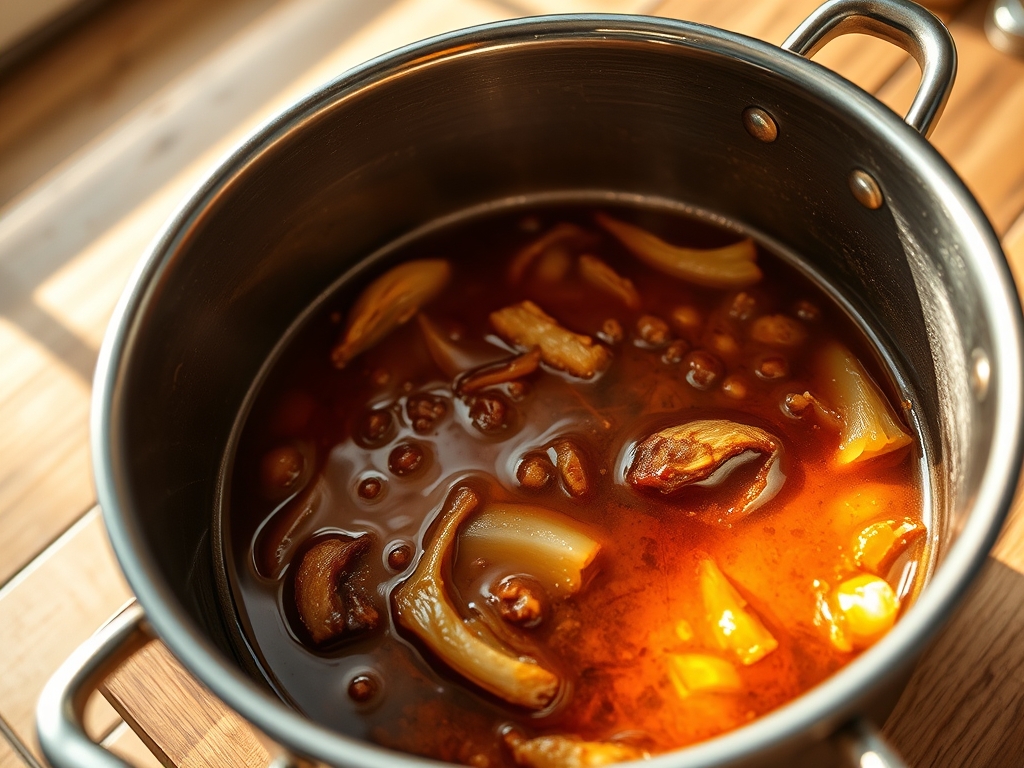
1. Thermal Priming and Fat Rendering
Begin by heating your heavy bottomed saucier or Dutch oven over medium heat. Add the olive oil and the diced pancetta. You are looking to render the fat slowly until the pancetta is crisp and the base of the pan is coated in liquid gold. Use a bench scraper to move the bits around, ensuring no scorching occurs.
Pro Tip: Fat is the primary conductor of flavor. By starting with pancetta, you create a lipid barrier that protects the lean rabbit meat from direct, searing heat, which prevents the proteins from tightening too aggressively.
2. The Maillard Execution
Season the rabbit joints heavily with sea salt. Increase the heat to medium high and sear the rabbit in the rendered fat. Do not crowd the pan. You want a golden brown crust, not a grey steam. Remove the rabbit once a crust has formed and set it aside on a stainless steel tray.
Pro Tip: Use a digital scale to ensure even portions, which guarantees that every piece reaches the target internal temperature simultaneously. The Maillard reaction creates complex flavor compounds that are essential for a deep, savory braise.
3. Aromatics and Deglazing
Reduce the heat to medium. Add the shallots, carrots, and garlic to the residual fat. Sauté until the shallots are translucent and have picked up the "fond" from the bottom of the pan. Pour in the white wine to deglaze, scraping the bottom of the pan vigorously.
Pro Tip: Deglazing is a chemical process where the acidity of the wine dissolves the caramelized proteins stuck to the pan. This integrates those high intensity flavors back into the liquid phase of the dish.
4. The Braising Submersion
Return the rabbit to the pan. Add the chicken stock until the liquid covers the meat by two thirds. Add the thyme and Dijon mustard. Bring to a bare simmer, then cover with a tight fitting lid and transfer to a 150C (300F) oven for 75 to 90 minutes.
Pro Tip: A tight lid creates a closed pressurized system. This allows the collagen in the rabbit's connective tissue to break down into gelatin without the liquid evaporating and drying out the top of the meat.
5. Final Emulsification and Resting
Once the meat is fork tender, remove the rabbit. Place the pan back on the stove and boil the liquid to reduce it by one third. Whisk in the cold butter to aerate and emulsify the sauce into a glossy, viscous coating. Return the rabbit to the sauce to glaze before serving.
Pro Tip: Whisking in cold butter (monter au beurre) at the end creates a stable emulsion that coats the palate and balances the acidity of the wine and mustard.
Section B: Prep & Timing Fault-Lines:
The most common timing error is the "Rapid Boil" mistake. If the braising liquid boils aggressively rather than simmers, the muscle fibers will contract and squeeze out all internal moisture, resulting in "stringy" rabbit. Always use an oven for braising rather than a stovetop to ensure 360 degree even heat distribution. If you find the meat is still tough after 90 minutes, do not increase the heat. Instead, extend the time in 15 minute increments. The breakdown of collagen is a function of time and consistent temperature, not raw heat intensity.
THE VISUAL SPECTRUM
Section C: Thermal & Visual Troubleshooting:
Referencing the Masterclass photo, your final product should exhibit a deep, amber glaze that clings to the meat without being greasy. If the sauce looks broken or oily, you have overheated the butter during the final emulsification. To fix this, add a teaspoon of cold water and whisk vigorously. If the rabbit looks pale, your initial sear was insufficient; you cannot gain color once the liquid is added. If the carrots are mushy, they were cut too small. Aim for uniform 1cm rounds to ensure they survive the 90 minute thermal cycle while maintaining their structural integrity.
THE DEEP DIVE
Macro Nutrition Profile:
Rabbit is a nutritional powerhouse for the high performance athlete. It contains approximately 33 grams of protein per 100g serving with only 3.5 grams of fat. It is exceptionally high in Vitamin B12 and Selenium, making it a superior choice for metabolic recovery.
Dietary Swaps:
- Vegan: This protocol is specific to game protein, but the aromatic base can be applied to King Oyster mushrooms. Swap stock for a mushroom dashi and use vegan butter for the final emulsion.
- Keto: This recipe is naturally Keto compliant. Ensure the Dijon mustard contains no added sugars.
- GF: The recipe is naturally gluten free, provided your chicken stock is certified.
Meal Prep & Reheating Science:
To maintain molecular structure during reheating, do not use a microwave. Microwaves vibrate water molecules, which can tear the delicate protein fibers of the rabbit. Instead, reheat gently in a covered pan over low heat with a splash of additional stock to maintain the viscous nature of the sauce.
THE KITCHEN TABLE
Why is my rabbit meat dry even though it is in liquid?
Overcooking or boiling the liquid causes the lean muscle fibers to contract and expel their internal juices. Keep the temperature low and stable to ensure the protein remains hydrated through the transition of collagen to gelatin.
Can I use red wine instead of white?
Red wine creates a much heavier, more rustic flavor profile that can mask the delicate sweetness of the rabbit. White wine provides a piquant acidity that cuts through the richness of the pancetta and butter more effectively.
How do I know when the braise is finished?
The meat should yield to a fork with minimal resistance but should not completely disintegrate into the sauce. If the bone slides out easily with a gentle tug, you have achieved the optimal thermal finish.
What is the best tool for jointing a rabbit?
A heavy duty chef's knife or a pair of poultry shears is essential. You must cut through the joints rather than the bone to avoid creating small, dangerous bone shards in your finished Braised Rabbit Prep.

